This tutorial copied from here http://www.windowscentral.com/how-move-your-photos-android-windows-10
1. Import all photos using the Phone Companion app
The Phone Companion app is new from Microsoft for Windows 10. Much of it is geared at helping Windows users on iPhone or Android find their way with Microsoft services![]() on each respective platform. What the Phone Companion app can also do is help you to quickly import your entire photo library from your phone to your computer.
on each respective platform. What the Phone Companion app can also do is help you to quickly import your entire photo library from your phone to your computer.
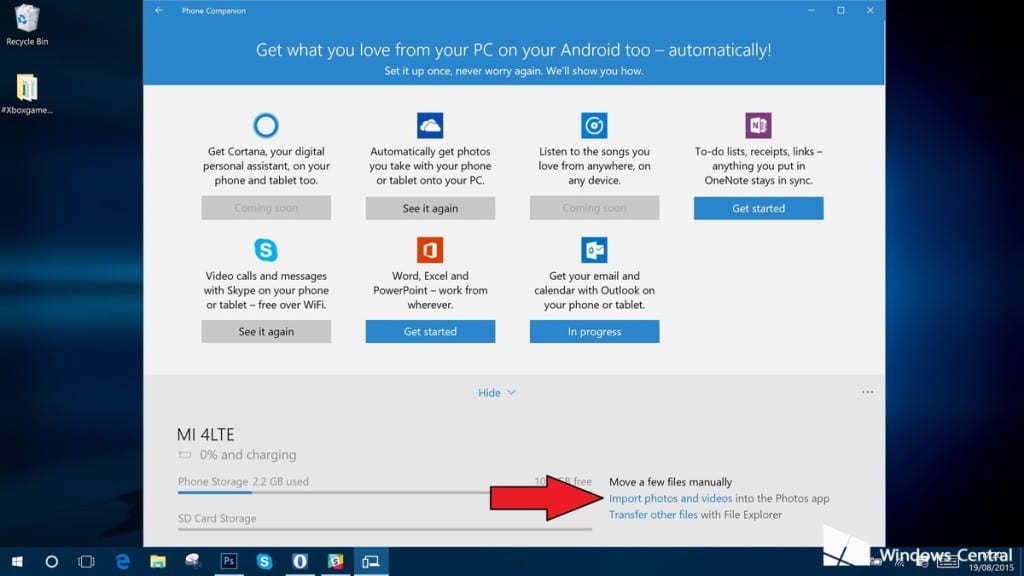
Plug your Android phone in to your Windows 10 machine using the regular microUSB cable. If the Phone Companion app doesn’t launch, go into the Start Menu and select it. You may also need to make sure your Android phone is in MTP transfer mode. You should see a notification on the phone that will tell you if it’s connected as a media device or not. Tapping on it will take you to the necessary settings, just ensure MTP not PTP is selected.
When it opens you’ll see the screen above, with some Microsoft apps and services above some information about your phone. For what we want here you’ll need to seek out the “Import photos and videos into the Photos app” option highlighted above.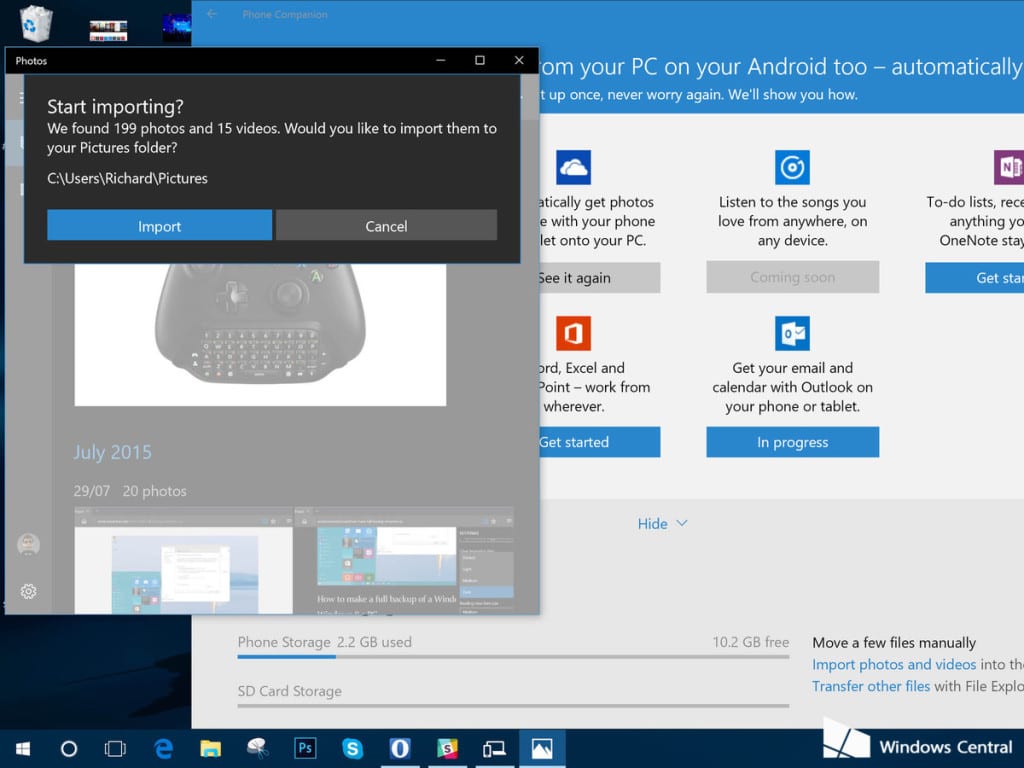
After you’ve clicked on that the stock Photos app for Windows 10 will open and you’ll see the message shown here. By default it’ll import all your photos and videos to the Pictures file on your computer. So this is a perfect method if you just want to dump everything at once.
2. Using File Explorer
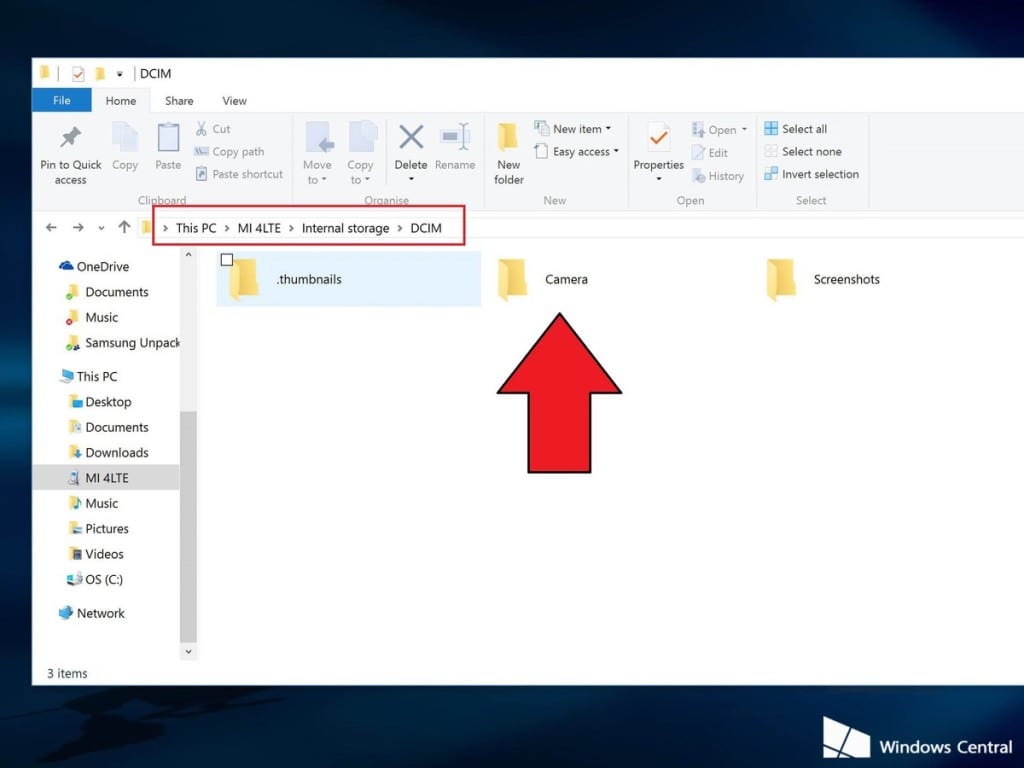
If you don’t want to do a blanket import (or, even if you do) there’s File Explorer at your disposal. Once you’re plugged in and in MTP mode as detailed in point one, File Explorer will see the contents of your phone. To get to your photos you’ll need to navigate to the correct folder on your phone, and this will vary across different models.
On the phone we’re using here (a Xiaomi Mi 4) our photos are found by going to Internal Storage > DCIM > Camera. From here you can simply drag and drop the photos you want to move from your phone to your computer.
3. Using the cloud
The great thing about Windows 10 is that there will be a solution for most people even if Microsoft isn’t the direct supplier of it. The cloud is one of these situations. OneDrive is baked into Windows 10 but you can just as easily use other alternatives, like Dropbox, for example. Both of these can be used to sync your photos to your computer without the need for cables. We’ll focus on these two for the purposes of this guide, but many of the same steps may apply to your chosen cloud service.
What’s also great about both OneDrive and Dropbox is that their respective Android applications have camera auto-backup built in. This means you can turn it on and just not worry about syncing anything. Your photos will upload to the in cloud the background and then, providing you’re syncing those folders to your PC, they’ll just appear. Like magic.
For either option, first go into the Settings in the Android apps and ensure you have camera backup turned on to take advantage of this. If you don’t want to do it this way you can manually upload your photos to your cloud accounts and still get them on your computer with these easy steps.
One Drive
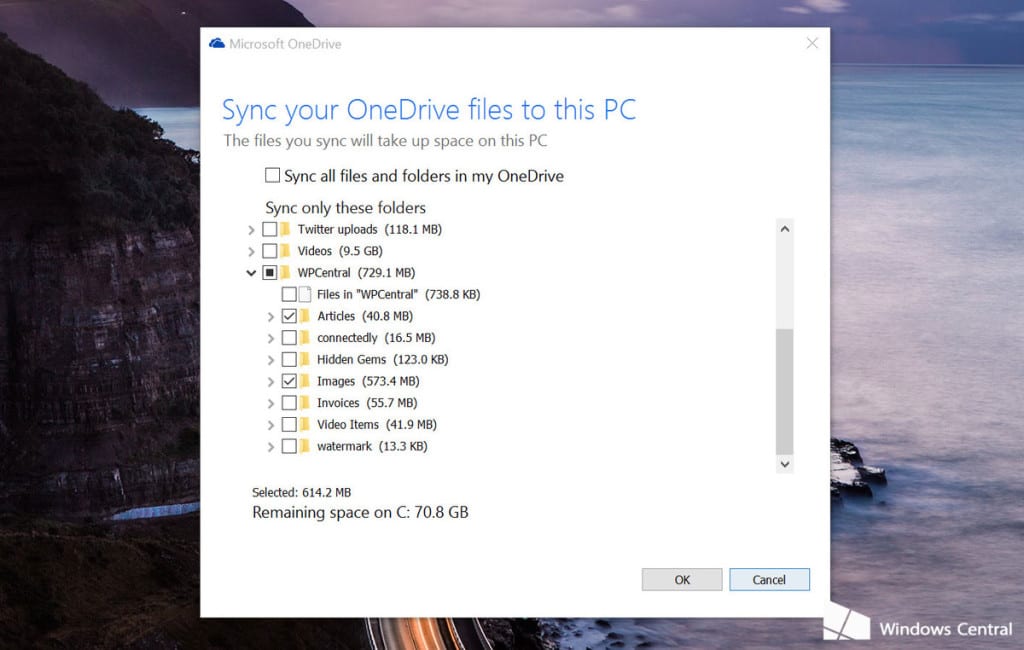
To get your photos from OneDrive onto your Windows 10 device you’ll first need to tell it to sync the right folder.
Drop Box
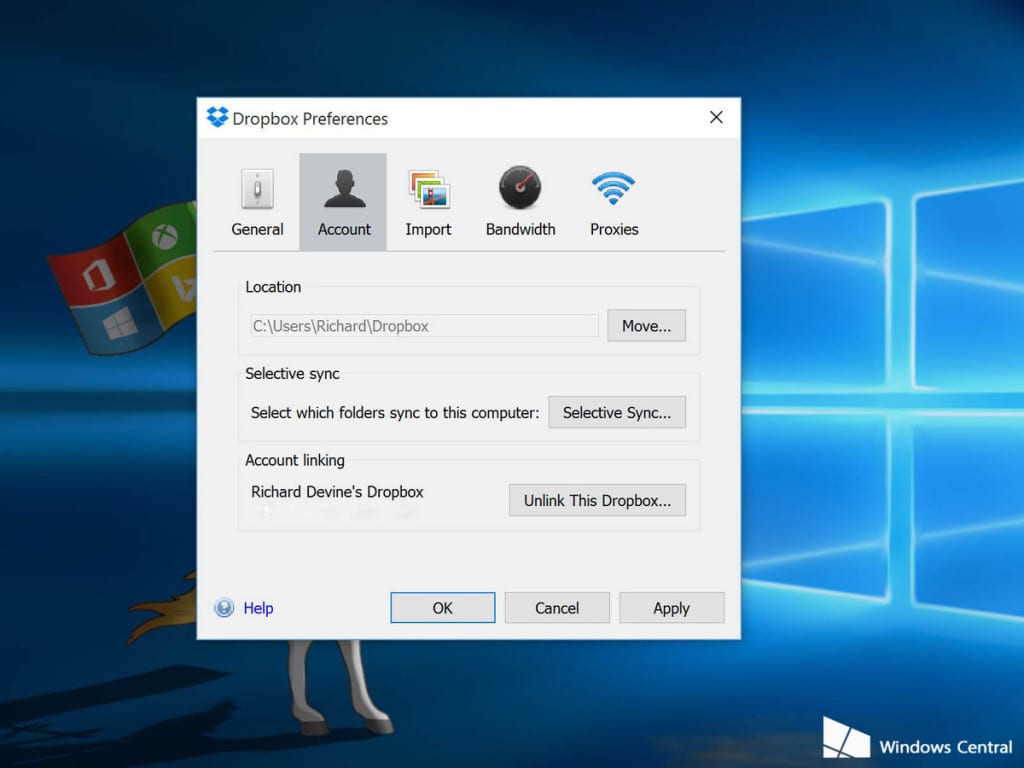
Unlike OneDrive, Dropbox needs to be installed onto your Windows 10 device. We’re not talking about the Store app, either, but the desktop sync app that you can download directly from Dropbox.
Both of these methods will keep your phone and Windows 10 PC in sync (data connection pending) so you don’t ever have to worry about manually transferring your snaps again.
Those are a few of the more common methods to get your treasured snaps from your Android phone to your Windows 10 PC.

