 The greatest challenge as a computer tech and a photographer is actually helping other people organize and edit photos. Why?
1. Expectations vary from person to person as too often what a person wants to do. that one app won’t allow, leading to frustration for you and I.
One person wants images imported automatically and done as few clicks as possible. The next person wants full control over what folder they go in and what they are named. Another person doesn’t want to edit much and another person wants to edit extensively.
2. Programs and Window versions people use vary greatly as Windows 8, 8.1 and 10 all have different photo apps built into the computer (as well as iPhoto and the Photo app on the Mac side varies by version) Importing and other steps can be very different between versions as well. How I do it in Windows 7 won’t work in Windows 8 or 10 for instance.
3. Cameras vary greatly as well, with many types of memory cards and not every computer has a memory card reader.
I’m not going to say my way is the best or only way to do them but people generally like the photos I make so if you want something similar I’ll share my workflow process with you step by step. Go at your own risk, I could be doing it wrong for all I know. Haha.
Links to the Pro’s
I’m by far not a pro but here are people who I look up too.
https://lightroomkillertips.com/
http://kelbyonelive.com/lrdownload
https://sleeklens.com/lightroom-tutorials/
For the official Lightroom tutorials with videos, click on this link.
My Tool Kit
1. Canon EOS 5D Mark II 21.1MP Camera
2. Canon EF 28-300mm f/3.5-5.6L IS USM Lens
3. Canon EF 17-40mm f/4L USM Ultra Wide Angle Zoom Lens
4. B+W 77mm Kaesemann Circular Polarizer with Multi-Resistant Coating on all lenses
5. B+W ND filters for long exposures
6. Manfrotto tripod with RRS (Really Right Stuff) , BH-30 LR: Compact ball head with LR, BGE6-L: L-plate for Canon BG-E6 grip.
7. RRS TFA-01 Pocket ‘Pod
8. Satechi WTR-A Wireless Timer Shutter for long exposures
9. Transcend and SanDisk Extreme Pro Memory Cards
10. Shoot everything in RAW format, Mostly use Adobe Lightroom for editing, Adobe Photoshop for Panoramas and Perfect Photo Suite by onOne for fine-tuning photos, I use Windows 7 Professional for my windows install.
I edit photos to be as professional as possible therefore I use the standard in photo editing, Adobe Lightroom and Adobe Photoshop (Adobe Cloud 2015.2 version as of writing this tutorial)
Most people shoot photos as jpg, I shoot in RAW mode, basically, my photos will look blander straight off the camera than those shot in jpg. RAW means everything the camera sees gets stored as a large 20-22mb file with no in-camera processing. For most people, they shot in jpg mode which means your white balance, color corrections, sharpness and all the other settings in the camera are set then COMPRESSED into a jpg for ALL the photos you take. That means you have less post-editing options as well as fewer details to work with and a greater chance of noise in the photos with because it was compressed before being saved by the camera. For many that is a great thing, for me I want to edit each photo with as many options and details as I can have the richest display.
Lightroom is the kitchen in which I cook the RAW files and make them into jpg files
Show and Tell time
Here is a quick video I made to show you how to do a quick edit of a photo in Adobe Lightroom.
Below is the more tutorial style of how I edit photos.
It might look like a lot of complex steps but once you find your own rhythm photo editing can go quick. It took me about 2-3 minutes from start to finish to make this photo.
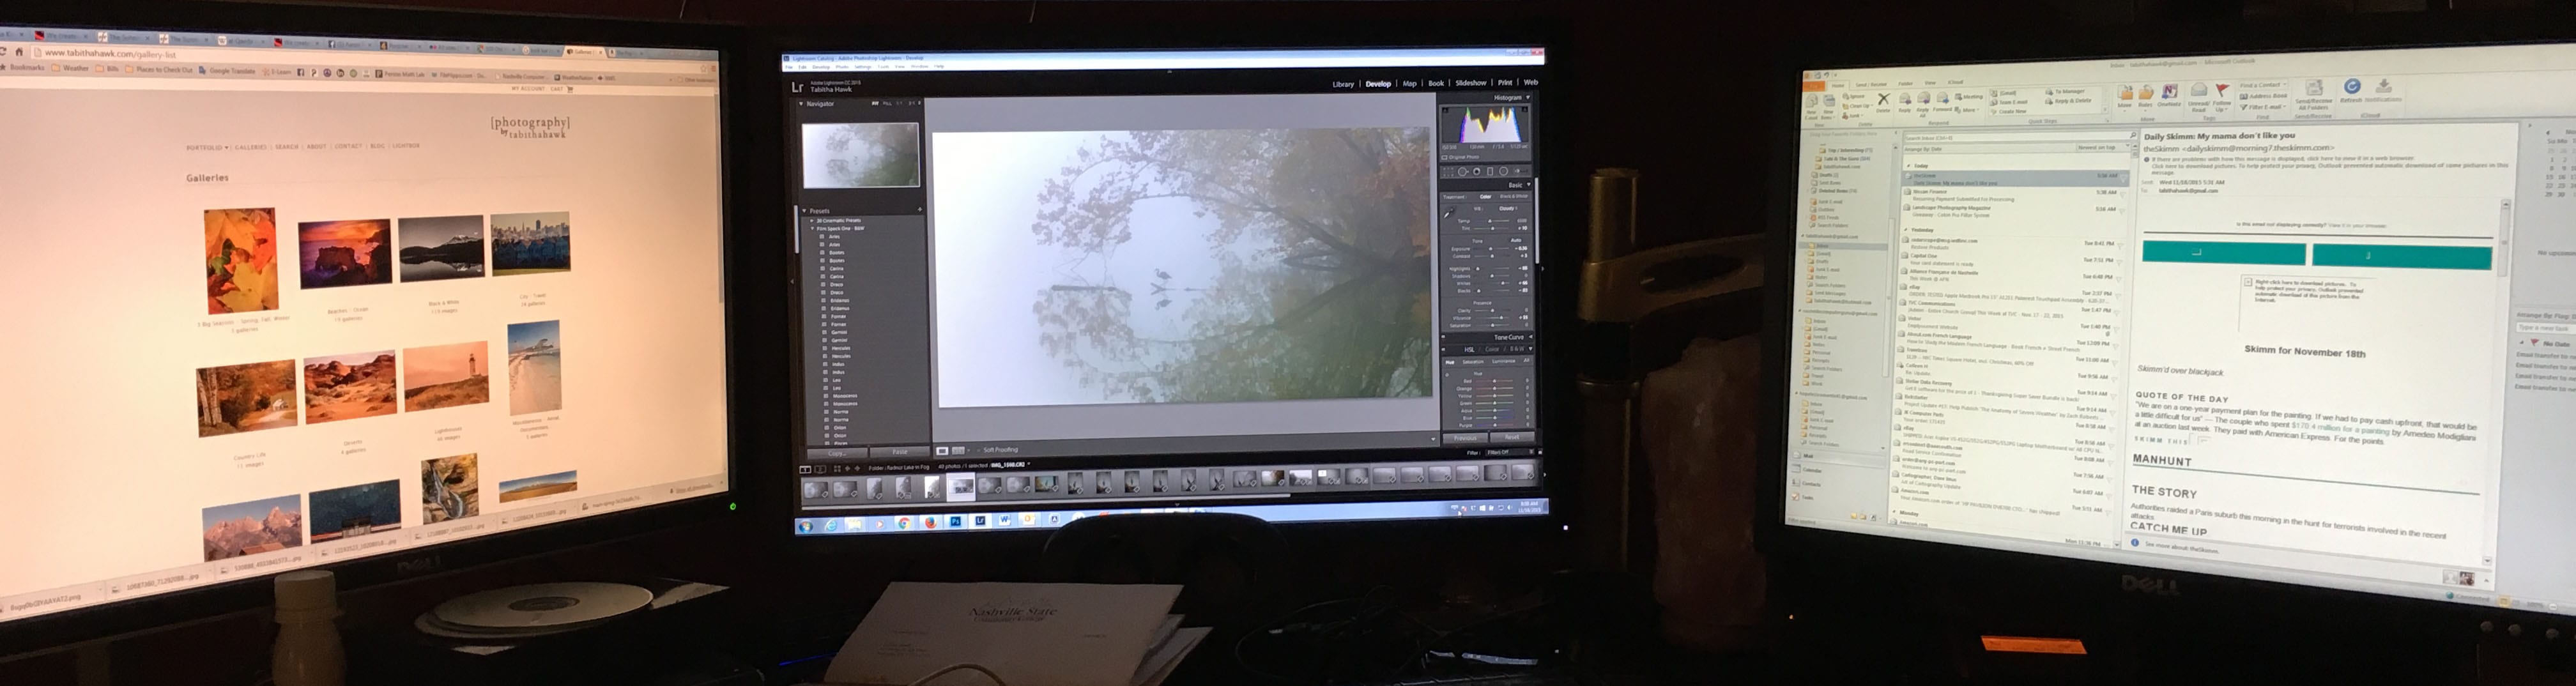
The middle monitor is my Professional Graphics grade monitor and I use it for all my photo editing.
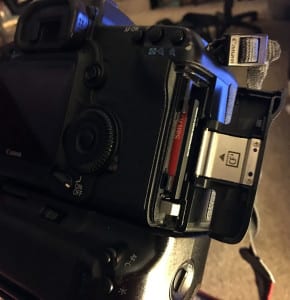
Step 1. Remove CF memory card from Canon 5D Mark II camera
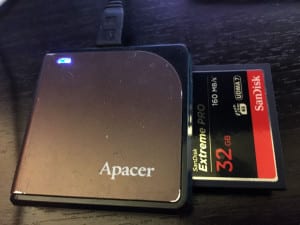
2. Place Memory Card in Memory Card Reader
3. In my case, Windows Explorer opens automatically when I insert the Memory Card if not Use the Windows Key and the E key at the same time and that will open Windows Explorer. My Memory Card is the letter E, yours could be any letter. Click the letter of your memory card, mine is E and these Folders are what come up. Click on DCIM to open it.
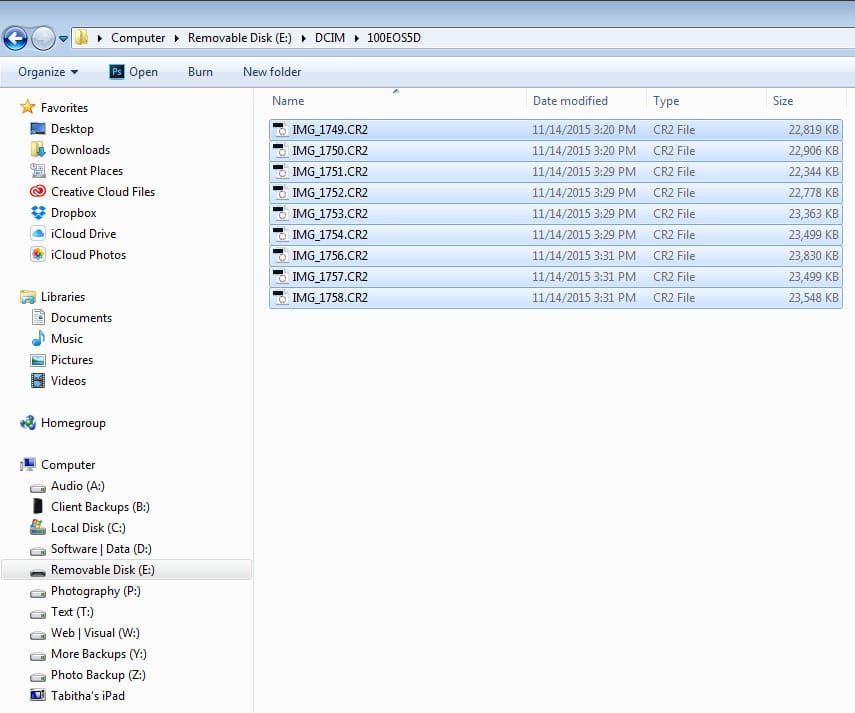
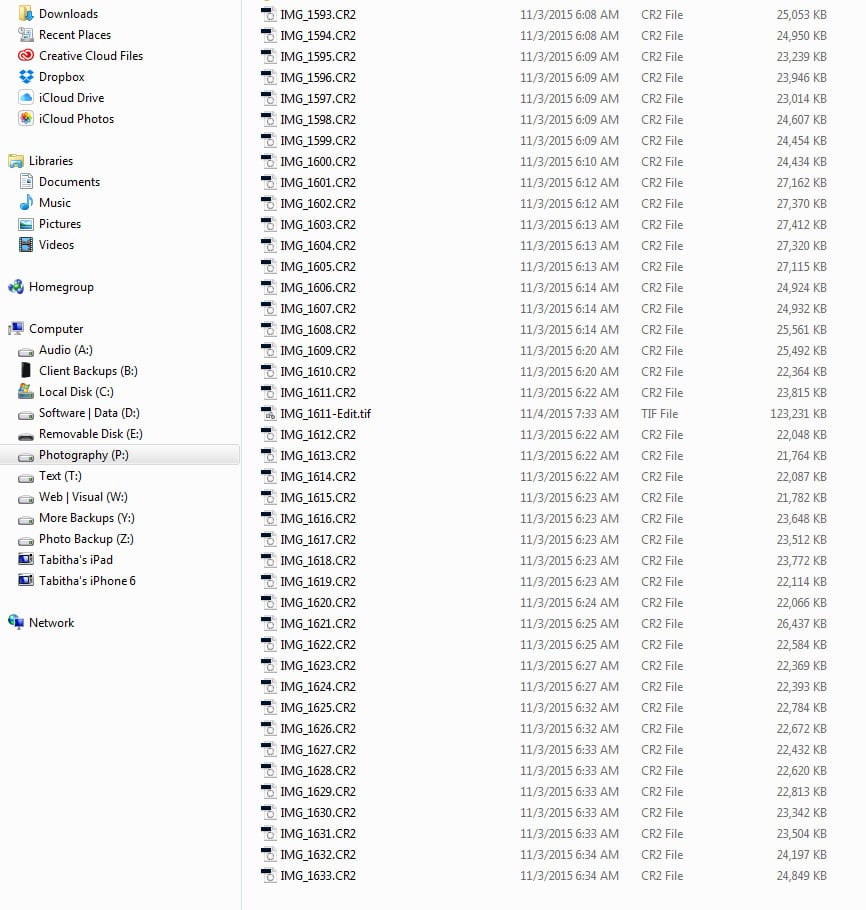
4. Highlight all the images in the folder, you can do that with the mouse and right click afterward they all go blue like in screenshot and click copy or in my case, I press Ctrl + A to highlight all the images and Ctrl + C to copy. Keyboard commands save a lot of time in my opinion.
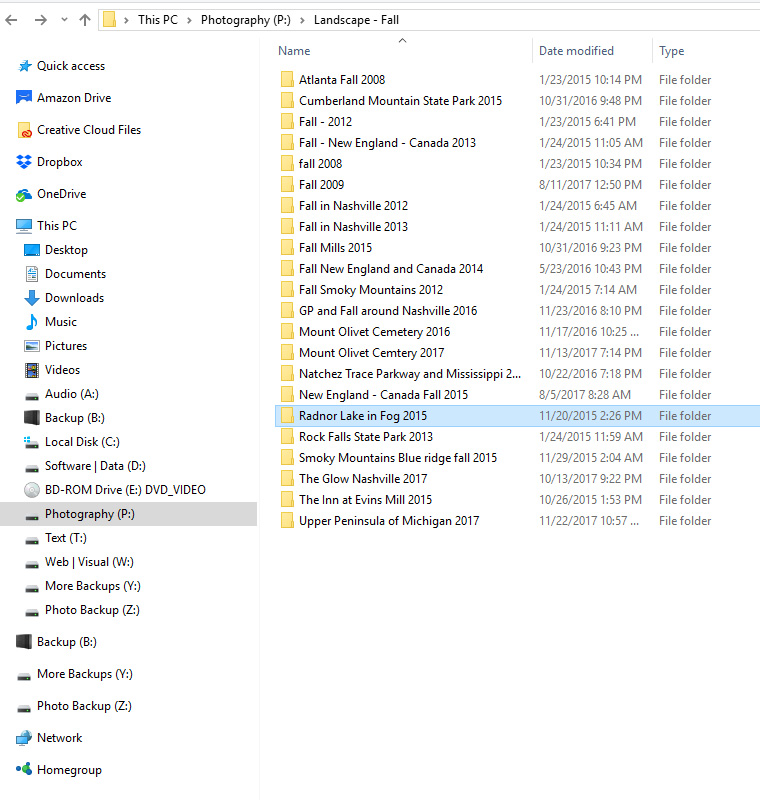
5. I store all my photos on a 4 TB internal hard drive and I gave it the letter P and name of Photography. I go to the P drive and double click on the folder that makes the most sense.
I have the following folders, Aviation – Drone, Documentary, Faith, Landscape, Landscape – Fall, Landscape – Winter, Lightroom Backups, Miscellaneous, Paranormal, People, Pictures (from iPhone), Travel, Video, Weather.
You will customize the folders to the type of photography that you do.

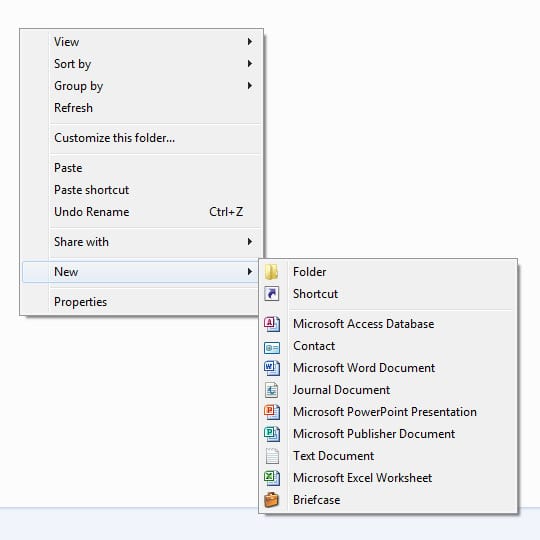
6. In this case, I would go to Landscape – Fall and Click on New Folder on the top toolbar or right click in a clear white area and go to New then Folder then gives it a name you will remember. This Case Radnor Lake in Fog 2015
7. Time to paste the photos from the memory card to the new folder, I do it by clicking Ctrl + P but you can right-click in an open clear area in the folder and choose Paste
8. Time to open Lightroom so I go to my Desktop to click on the Adobe Lightroom Shortcut
9. After that is open it is time to import that folder into Lightroom, click on the + sign near Folders on the left side of the screen and go to Add Folder. (Official tutorial on importing photos is here)

10. Go to the location of the folder you created and click “select folder”, in my case this folder is located here in the Landscape – Fall Directory on the P drive in a sub directory called Radnor Lake in Fog.

11. Thumbnail previews come up of all the photos, manually select the photos you want or click on the Select All option
12. Select individual photos or click on Check All down at the bottom left and then click import on the bottom right.

13. I’ll show you a quick dirty edit of this image, I spend less than 5 minutes per photo usually, many are less than a minute and then others will take hours, all depends on what the photo is and how much processing I need to do in order to get it to match the vision in my head. All the action will happen for the sake of this tutorial on the right side.

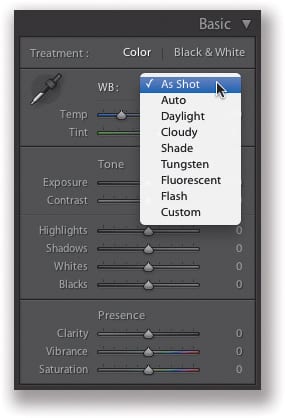
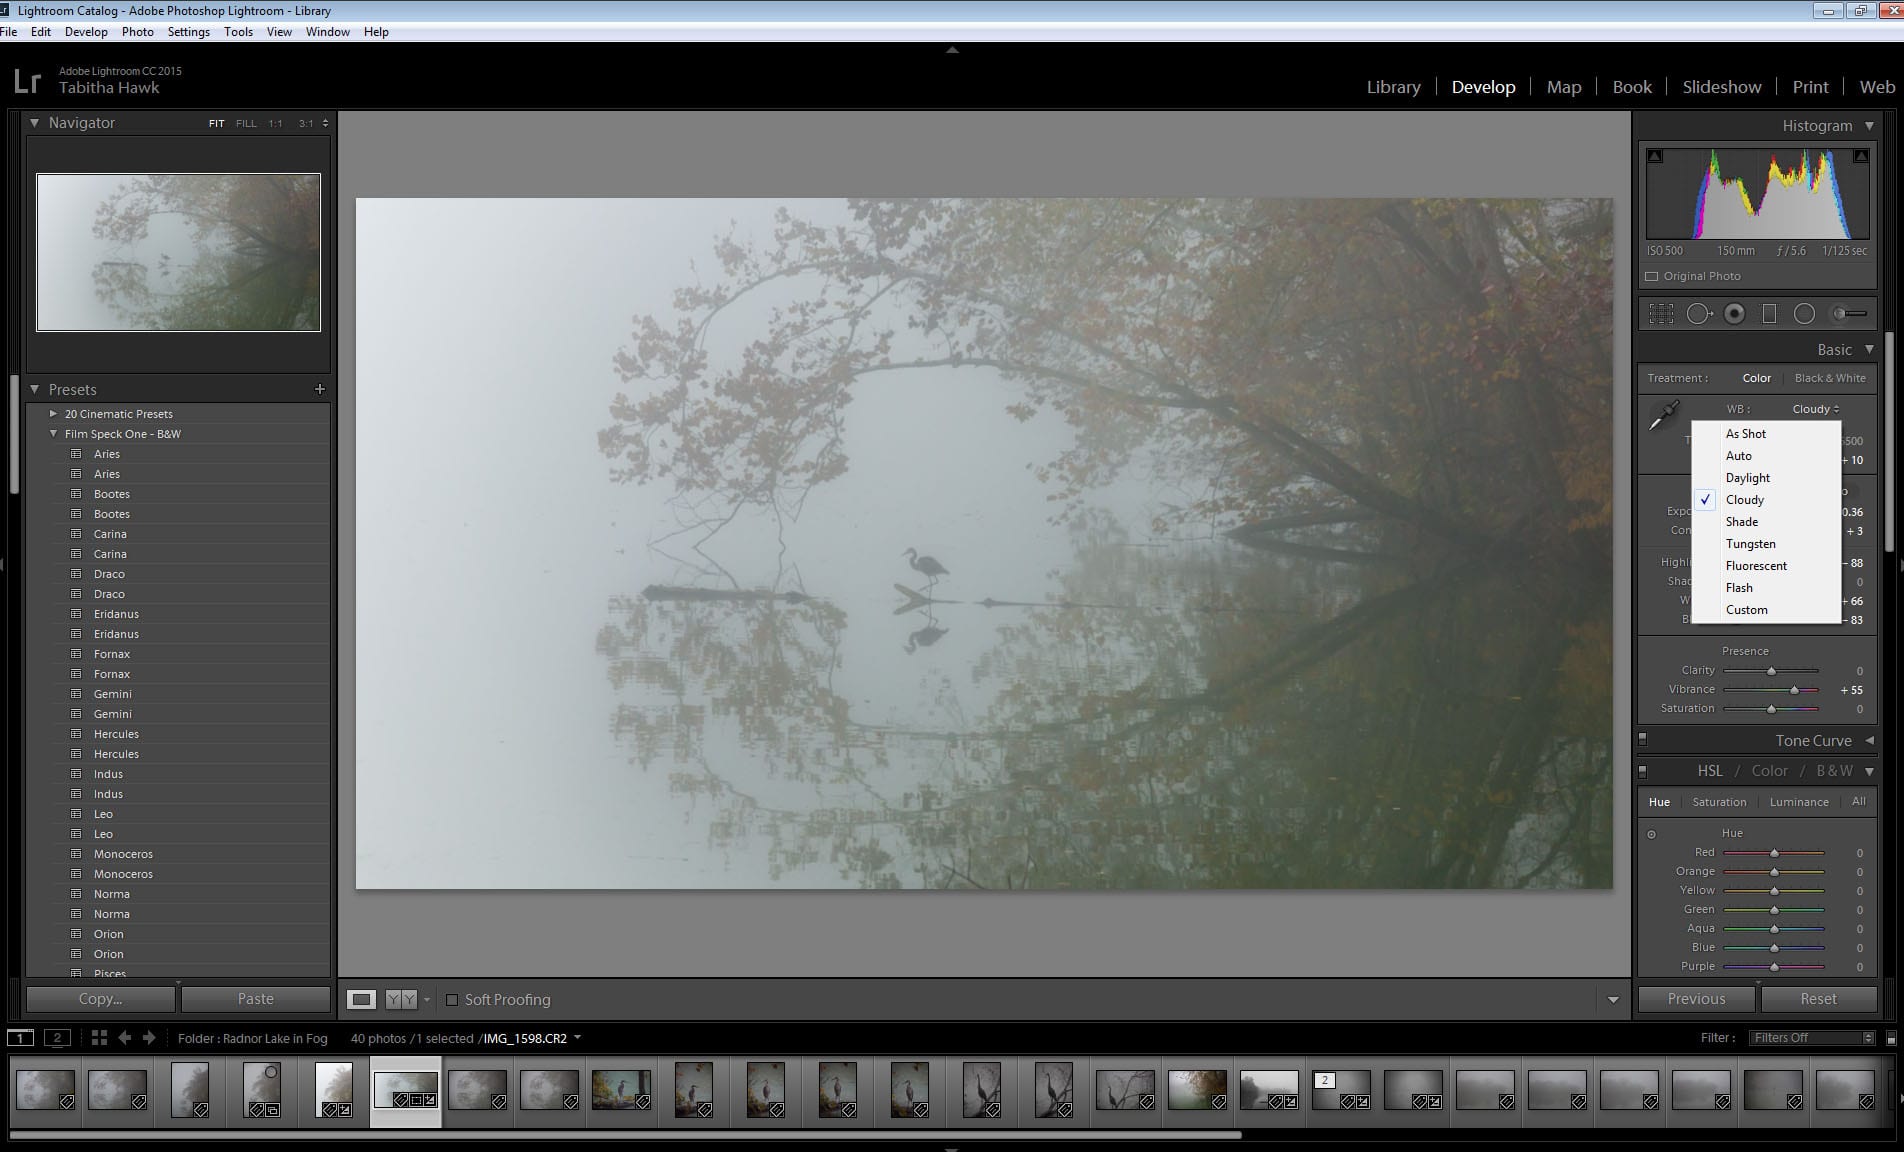
14. WB = White Balance. Since I shot photos in RAW I have all the options of White Balance. This is where making a photo sing can happen very quickly. Jpg photos will only have Auto and Custom as an option. For sunrise I use Cloudy and Shade to really bring that Orange color then I customize the temp by going back and forth on temp and Tint to it looking just right. For nighttime city and astrophotography I like to use Tungsten as the white balance as it turns the yellow / orange glow into a more pleasing blue tone.
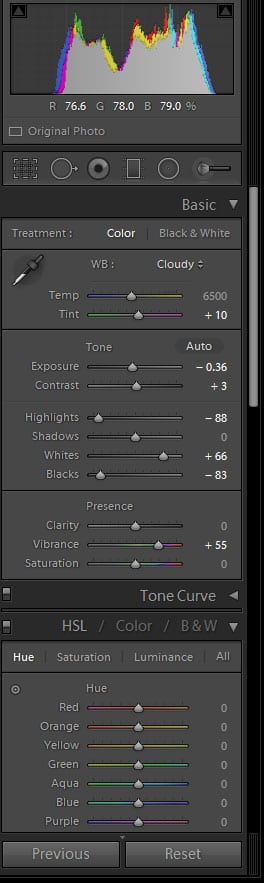
15. These are the settings I went with for this fog image, a lot comes down to style, if you like the result then that is what matters as you are free to experiment.
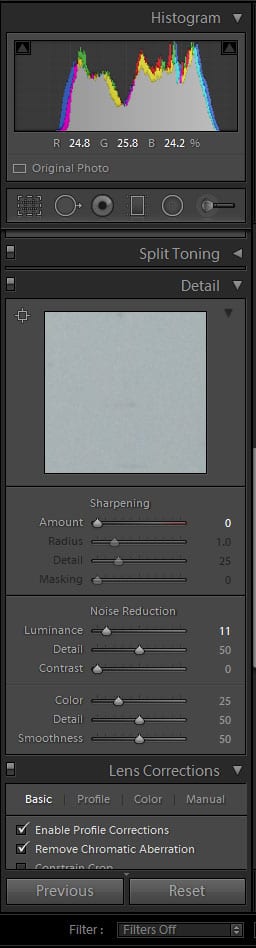
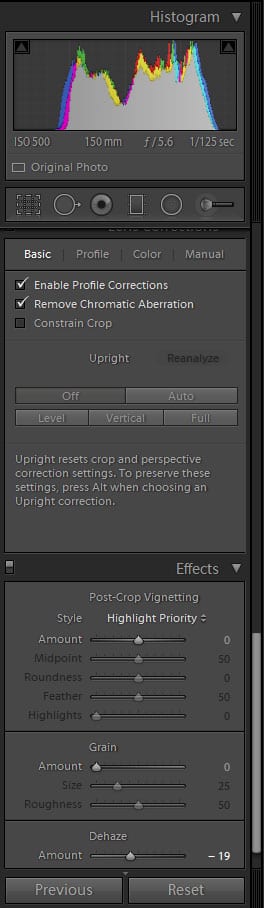
I tend to take the highlights down in many photos. Safer to use Vibrance then Saturation. I typically will do “Enable Profile Corrections” as it will correct problems known for your lens. The noise reduction slider can come in very helpful. Play with all the sliders, you won’t damage your original photo in Lightroom.
#Fun Tip: The HSL / Color / B & W module is a lot of fun, this is where you can make select colors go to black and white so you can have a kid holding a red flower and everything but the flower is grey scale. You can also make colors change to other colors too. Handy for fall photos when you make green into Yellow.
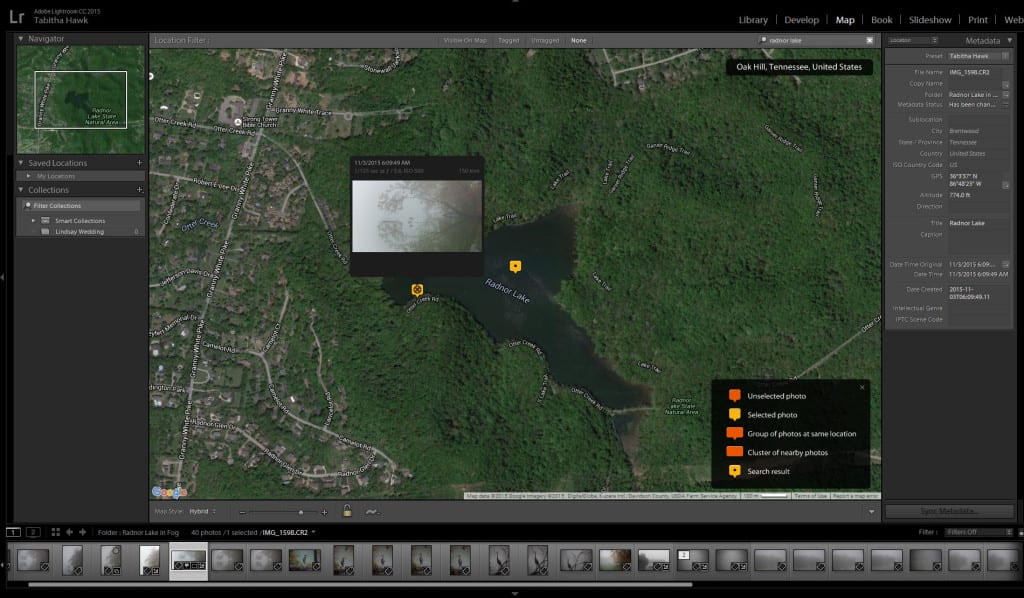
16. Lightroom can do so much more then what I’m showing, I’ve gone to multiple day photography conferences and day workshops and still consider myself as a novice due to the vast power Lightroom and Photoshop offers. A cool feature is adding your photo to the map. Click on Map on the top right.
Type in the location or address for where you took the photo and it will come up the map.
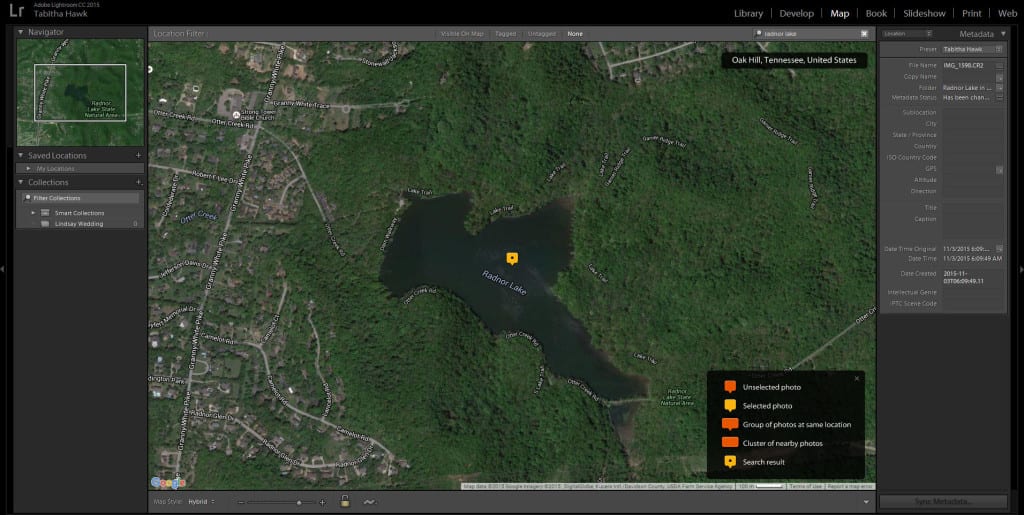
17. Left click on the image or Ctrl + A and highlight all the photos and drag them to where you took the photo. It will add the City and GPS location so when you upload the photo, many places will tag as the place. This where you can add a title and Caption saving you time entering that on Facebook, Flickr and other websites.
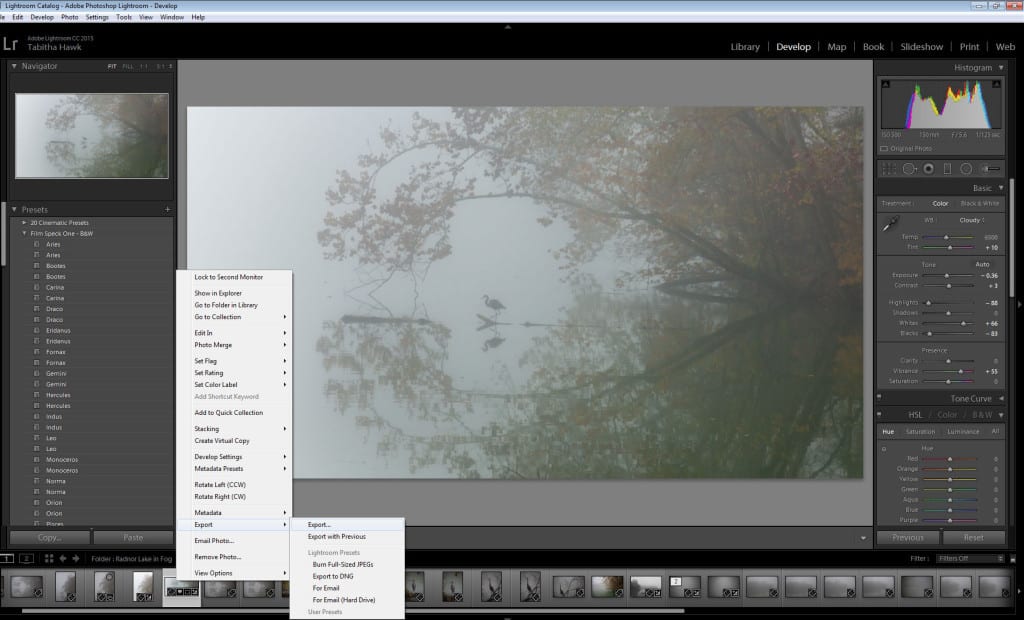
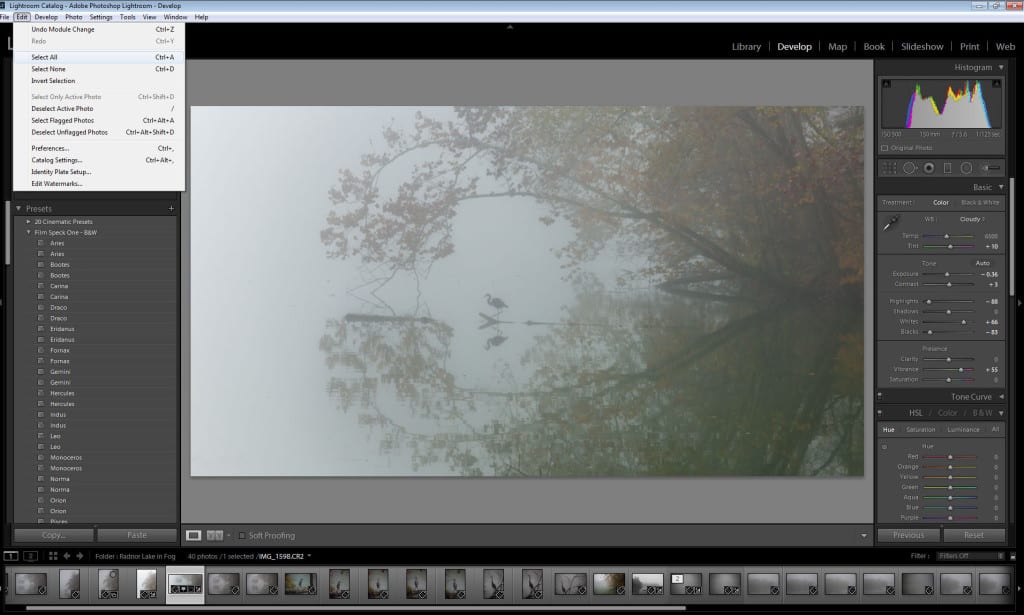
18. Time to export the RAW photo into a jpg for social media and sharing with people via email. You can select .tiff if you need a high-quality image for printing. If it is just one photo I’m exporting then right click on that image at the bottom and click on Export and then Export again. If it is all of them in that folder then go to Edit to the top menu bar and select all or Ctrl + A as I prefer.
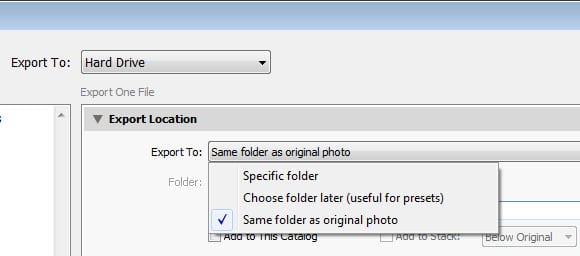
19. These are the export options I use, I make sure I’m exporting to the Hard Drive on top. I tend to export to the same folder as original photo and then select Put in Subfolder. For my watermarked photos I put them in a subfolder called Final for non-watermarked photos I put them in a folder called No Watermark.
File Naming is where you can convert all the IMG_1952 to Summer Fishing Trip 1.jpg
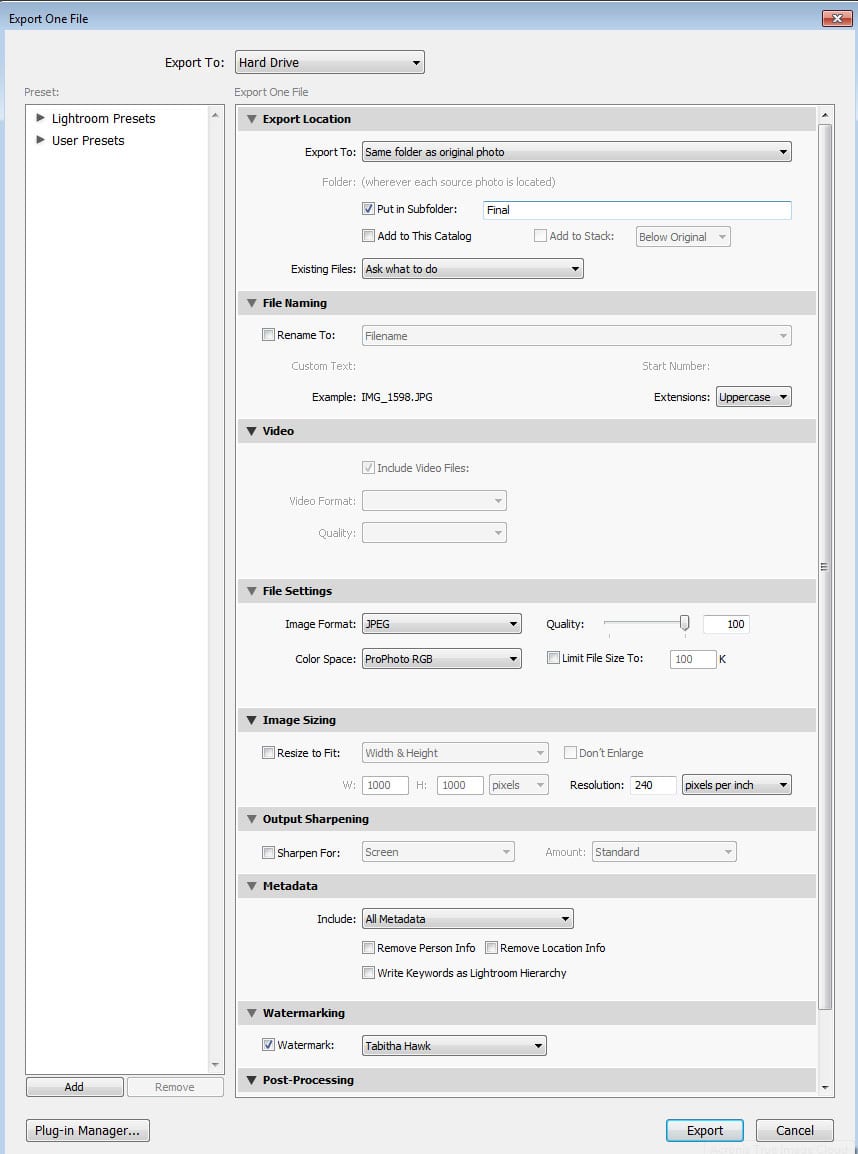
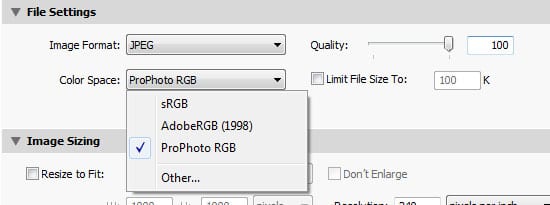
20. File Settings, I always do the Quality at 100%
Now for the color space, this is tough area as there are big names that argue for different ones, basically, if it is for web use then sRGB is best for color. You will find lots of stuff online relating to color space and what they recommend to work in. If you shoot in jpg, your camera has already chosen one of those color spaces already. This is why shooting in RAW format allows you to save a jpg in the widest color space. I honestly bounce back and forth between ProPhoto RGB and sRGB.
Lightroom uses Adobe RGB:
- for previews in the Library, Map, Book, Slideshow, Print, and Web modules
- when printing in Draft mode
- in exported PDF slideshows and uploaded web galleries
- when you send a book to Blurb.com (If you export books as PDF or JPEG from the Book module, however, you can choose sRGB or a different color profile.)
- for photos uploaded to Facebook and other photo-sharing sites using the Publish Services panel
In the Develop module, by default Lightroom displays previews using the ProPhoto RGB color space. ProPhoto RGB contains all of the colors that digital cameras can capture, making it an excellent choice for editing images. In the Develop module, you can also use the Soft Proofing panel to preview how color looks under various color-managed printing conditions.
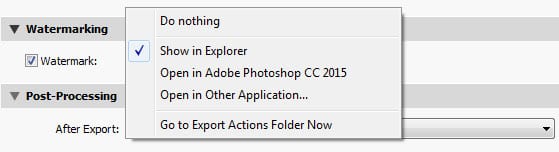
21. Post-Processing, you can choose what is best for you. For me, I like it when a Windows Explorer window pop-ups when it is done and then I work with it more online.
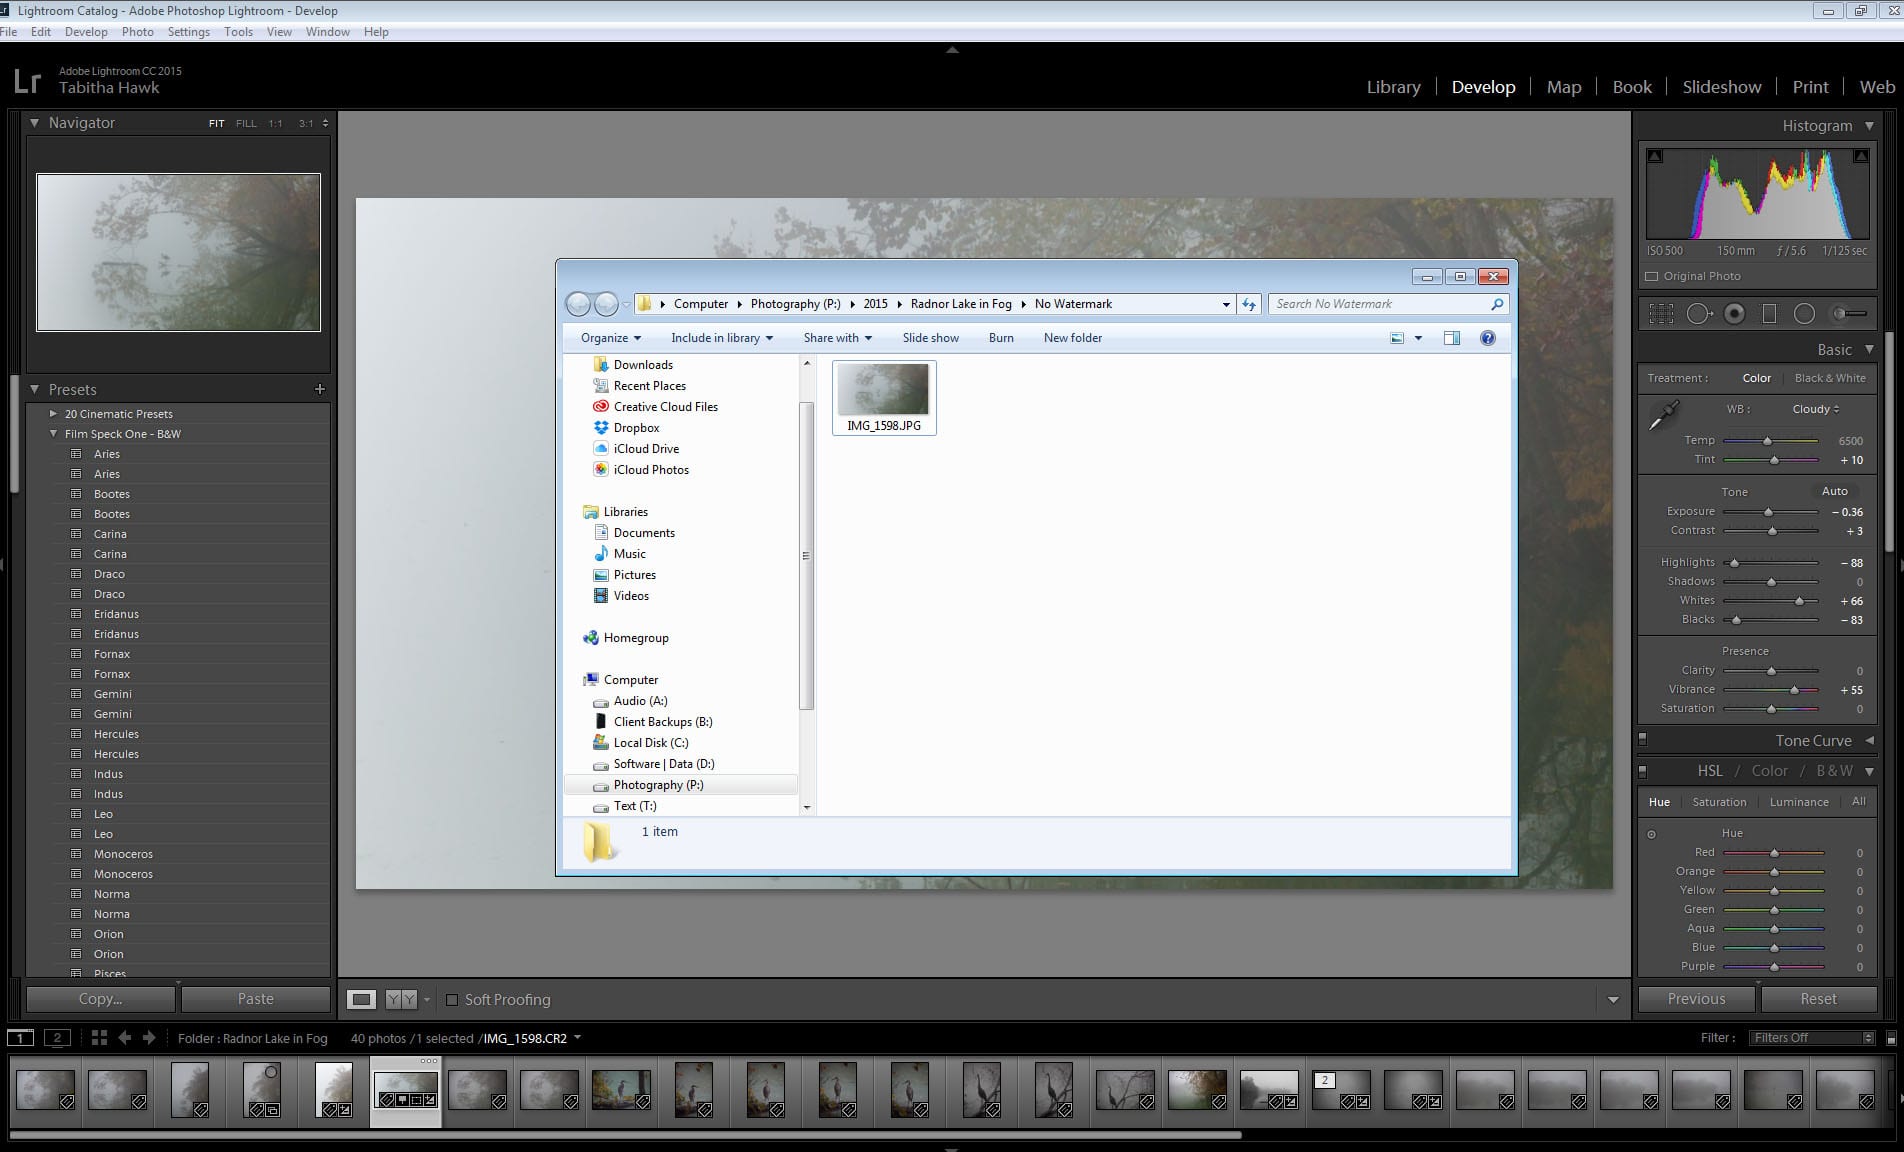
22. This what happens after it exports, in this case, I chose not use my watermark. You are finished, time to email, upload to social media, print or whatever the heart desires.
All done. It is pretty quick to do an image like this but some can go even quicker or even hours with fine-tuning.
